 Pin It
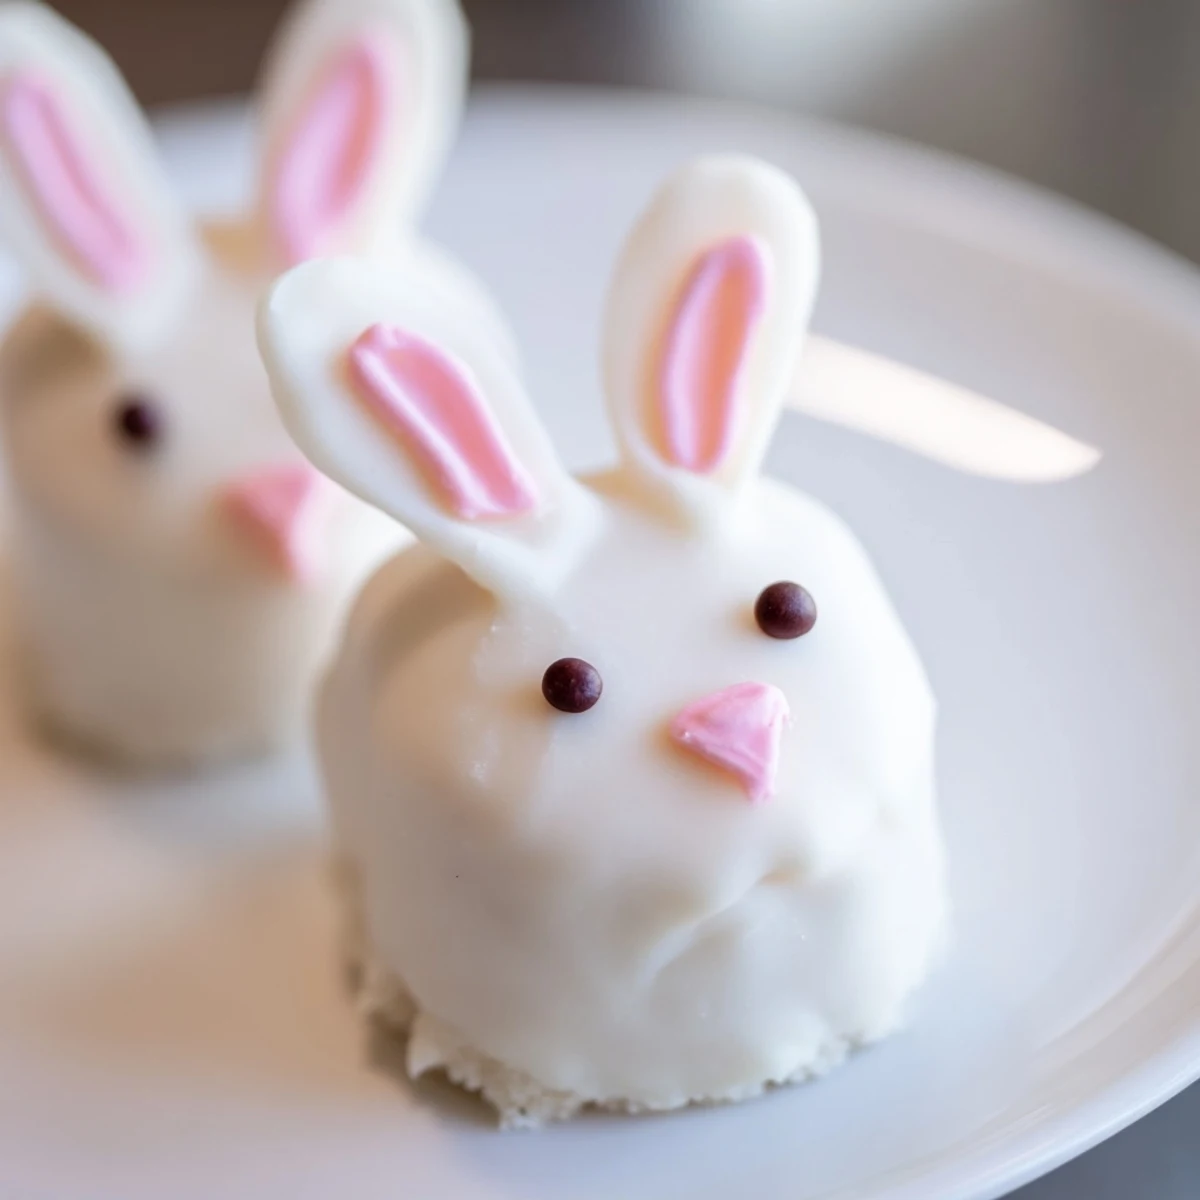
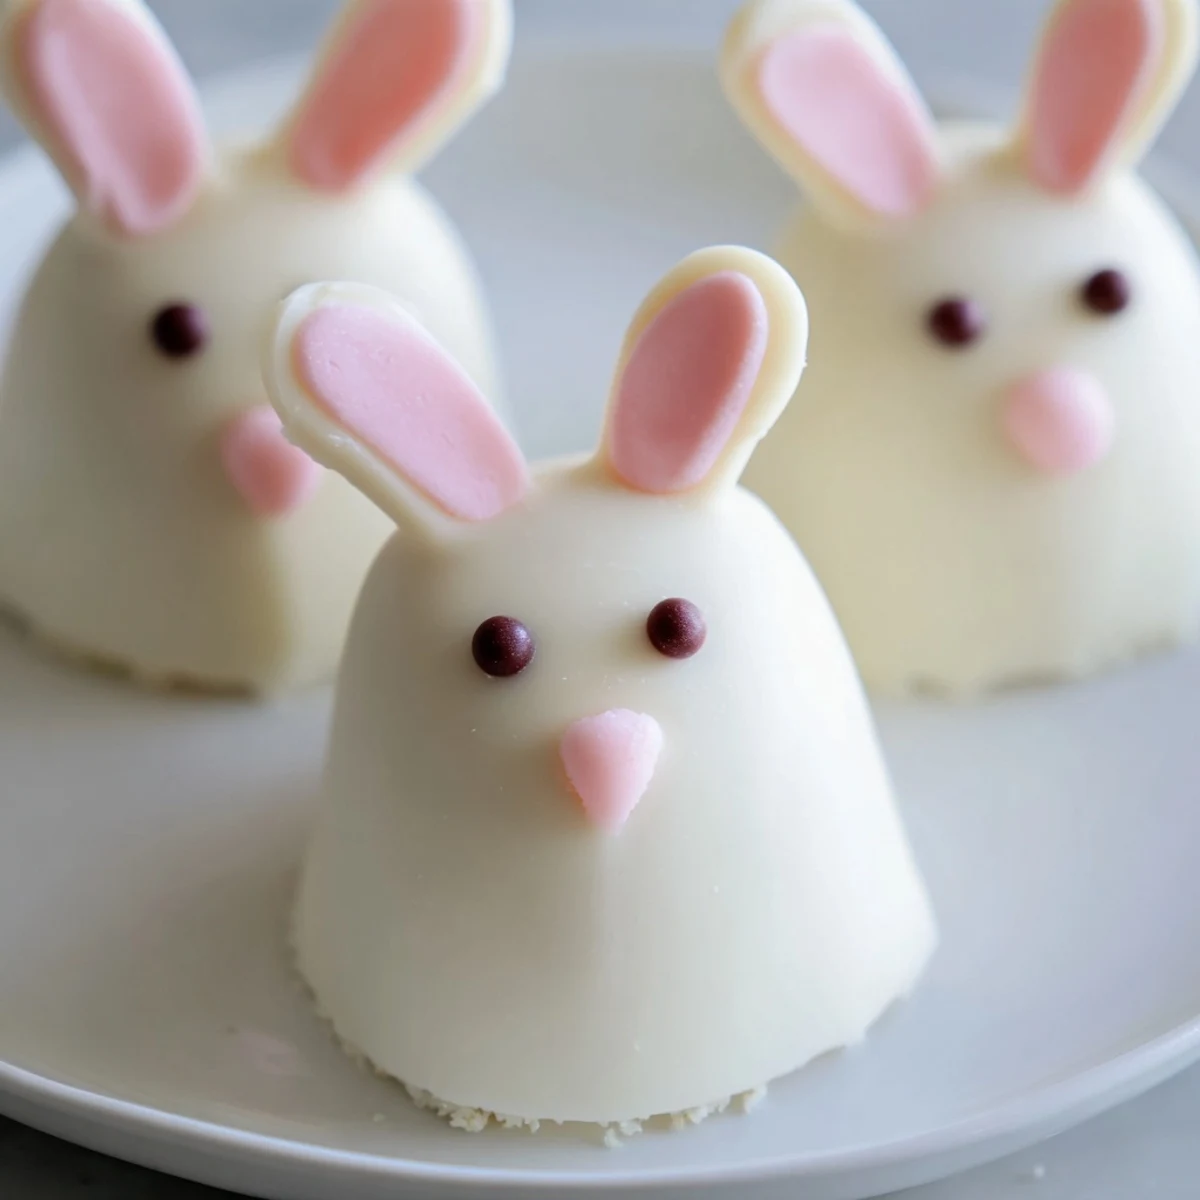
 These adorable bunny-shaped treats combine moist vanilla cake centers with silky white chocolate coating. Simply mix cake crumbs with cream cheese, form into bunny faces, insert sticks, and dip into melted chocolate. Decorate with candy eyes, sprinkles, or fondant ears for personalized Easter treats. Ready in just one hour, these handheld desserts are perfect for spring gatherings and children's activities.
My kitchen counter looked like a pastel explosion last Easter when my niece decided we needed "bunny pops" for the family gathering. We laughed so hard trying to shape the first few lopsided faces that I nearly forgot about the chocolate melting in the microwave. Those imperfect, whimsical treats disappeared faster than the carefully decorated ones, which taught me everything I need to know about holiday baking.
The year I made fifty of these for my daughters kindergarten class stands out as one of my favorite kitchen memories. Tiny hands reached up eagerly as I walked in with the tray, and seeing their faces light up made every minute of preparation worth it.
Ingredients
- Vanilla cake crumbs: Start with cake that has sat overnight for the best crumb texture that binds perfectly
- Cream cheese: Room temperature is essential here for smooth blending without lumps
- Unsalted butter: Softened butter helps the mixture hold its shape during dipping
- Powdered sugar: This adds just enough sweetness to balance the rich coating
- Vanilla extract: Pure vanilla makes a noticeable difference in the final flavor
- White chocolate: Candy melts are easier for beginners but real white chocolate tastes superior
- Cakesicle sticks: Insert these at an angle to prevent the cake from sliding off during serving
Instructions
- Mix the cake dough:
- Combine cake crumbs, cream cheese, butter, powdered sugar, and vanilla in a medium bowl, mixing until the mixture holds together when squeezed. The texture should resemble Play-Doh that can be shaped without crumbling.
- Shape the bunnies:
- Portion the dough into 8 equal pieces and gently flatten each into an oval bunny face shape. Work quickly and with a light touch to prevent the dough from becoming warm and difficult to handle.
- Add the sticks:
- Press a cakesicle stick about halfway into each bunny shape, then place them on a parchment-lined tray. Chill for at least 20 minutes until firm to the touch before moving to the next step.
- Melt the chocolate:
- Heat white chocolate in 30-second intervals, stirring thoroughly between each burst until completely smooth and fluid. Be patient and resist the urge to overheat, as white chocolate can seize and become grainy.
- Dip and coat:
- Dip each chilled cake pop straight down into the melted chocolate, then lift and tap gently against the bowl edge to remove excess coating. Work quickly so the chocolate does not set before decorating.
- Decorate while wet:
- Immediately add candy eyes, sprinkles, or fondant ears while the coating is still tacky. This ensures decorations adhere without needing extra adhesive.
- Set and serve:
- Let the cakesicles stand at room temperature until the chocolate hardens completely. Refrigerate briefly if needed, then serve upright in a jar or laid flat on a platter.
 Pin It
 These became an Easter tradition after my mom mentioned they reminded her of the chocolate rabbits she received as a child. Now making them feels like connecting to something bigger than just dessert.
Getting Creative With Flavors
One year I experimented with chocolate cake crumbs and a dark chocolate coating, which surprisingly became the new family favorite. Lemon cake with a white shell tastes like sunshine on a plate.
Making Perfect Bunny Ears
Fondant creates the cleanest ears, but I have used pink candy melts piped into ear shapes with surprising success. The key is attaching them while the white coating is still slightly tacky.
Serving And Storing
I display these in mason jars filled with colorful jelly beans or Easter grass for instant party centerpieces. They look stunning and stay upright for easy grabbing.
- Wrap individual cakesicles in clear bags tied with pastel ribbons for party favors
- Keep them refrigerated until serving time to maintain the best texture
- Make the cake shapes a day ahead and chill overnight for easier dipping
 Pin It
 These treats bring out the kid in everyone who makes them. Happy Easter baking!
Recipe FAQ
- → Can I make cakesicles ahead of time?
-
Yes, prepare these treats up to 3 days in advance. Store in an airtight container in the refrigerator, then bring to room temperature before serving for best texture.
- → What type of cake works best for cakesicles?
-
Vanilla, chocolate, or lemon cake all work beautifully. Use homemade cake or store-bought cupcakes crumbled into fine pieces. The key is achieving a moist consistency that binds well with cream cheese.
- → How do I prevent the chocolate from cracking?
-
Ensure cake pops are thoroughly chilled before dipping. Use room temperature chocolate for smooth coating. Avoid over-tapping excess chocolate, as thin layers are more prone to cracking.
- → Can I use candy melts instead of real chocolate?
-
Absolutely! White candy melts are designed for coating and often easier to work with. They set quickly and provide a smooth, professional-looking finish without tempering concerns.
- → What's the best way to color white chocolate?
-
Use oil-based or gel food coloring specifically made for chocolate. Water-based coloring can seize the chocolate. Add color gradually until achieving your desired pastel shades for Easter decorating.
- → Do I need a special mold for bunny shapes?
-
While molds help with uniform shapes, you can hand-form bunny faces easily. Flatten the cake mixture into ovals, use your fingers to create ear indentations, and attach fondant or candy decorations after dipping.