 Pin It
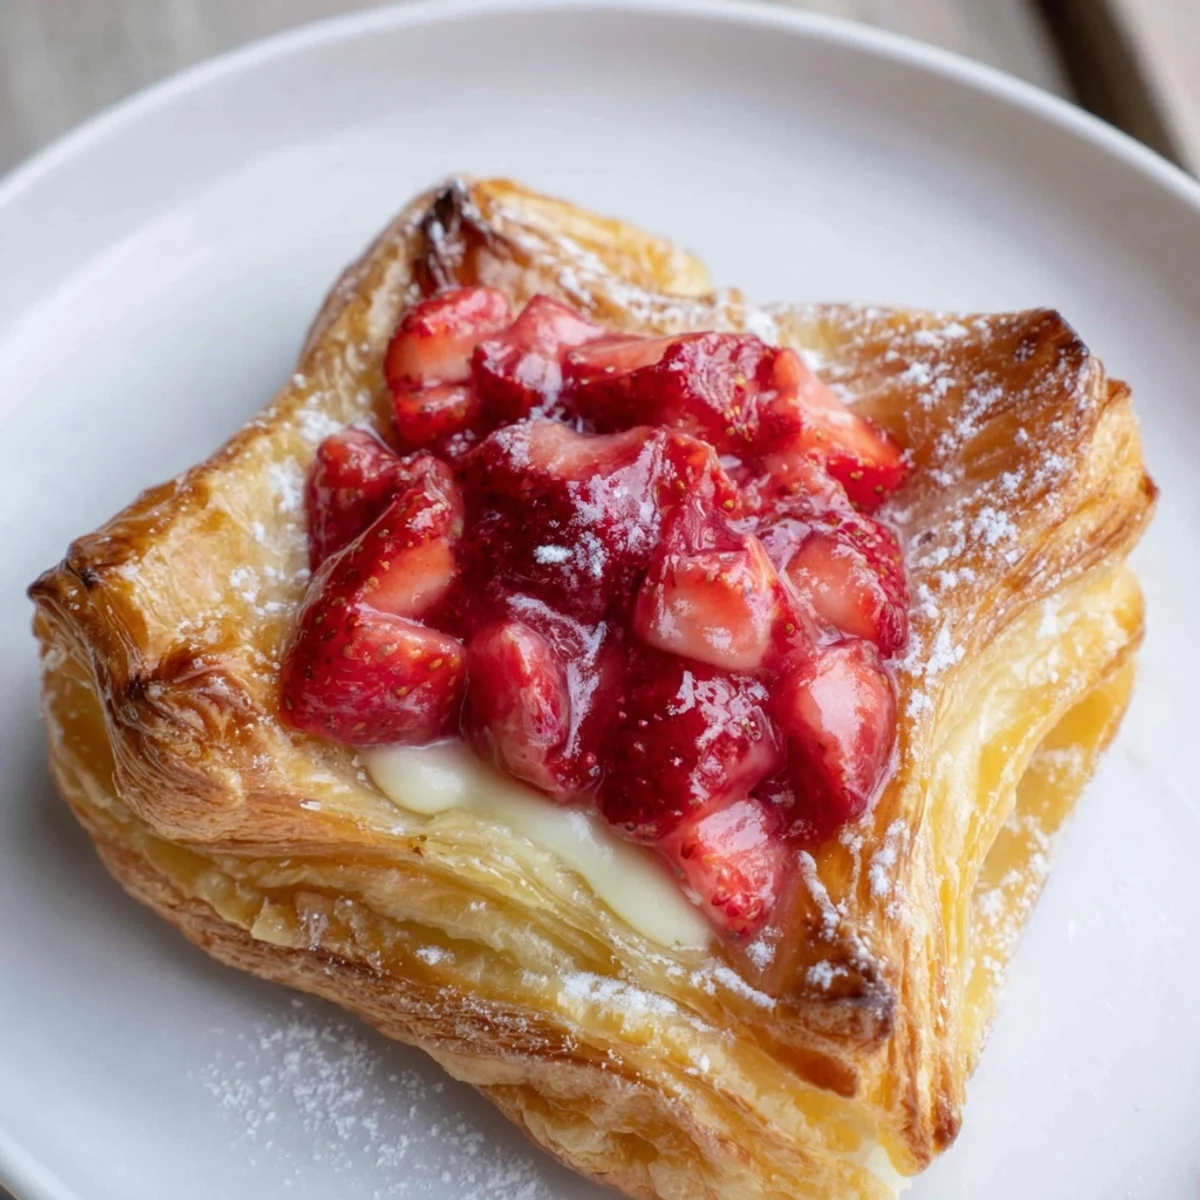
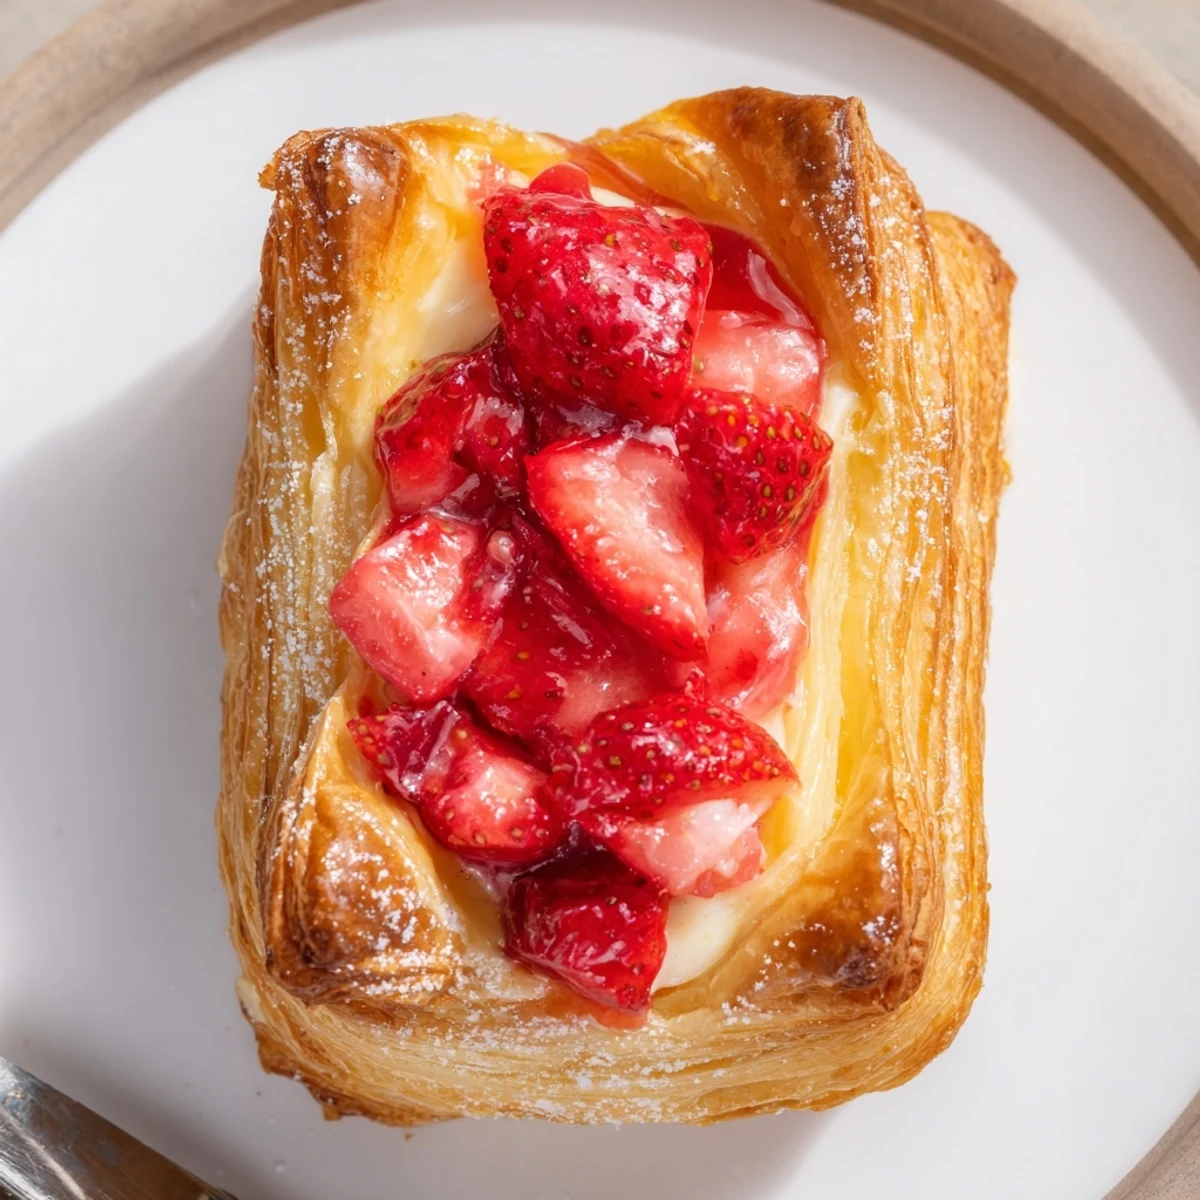
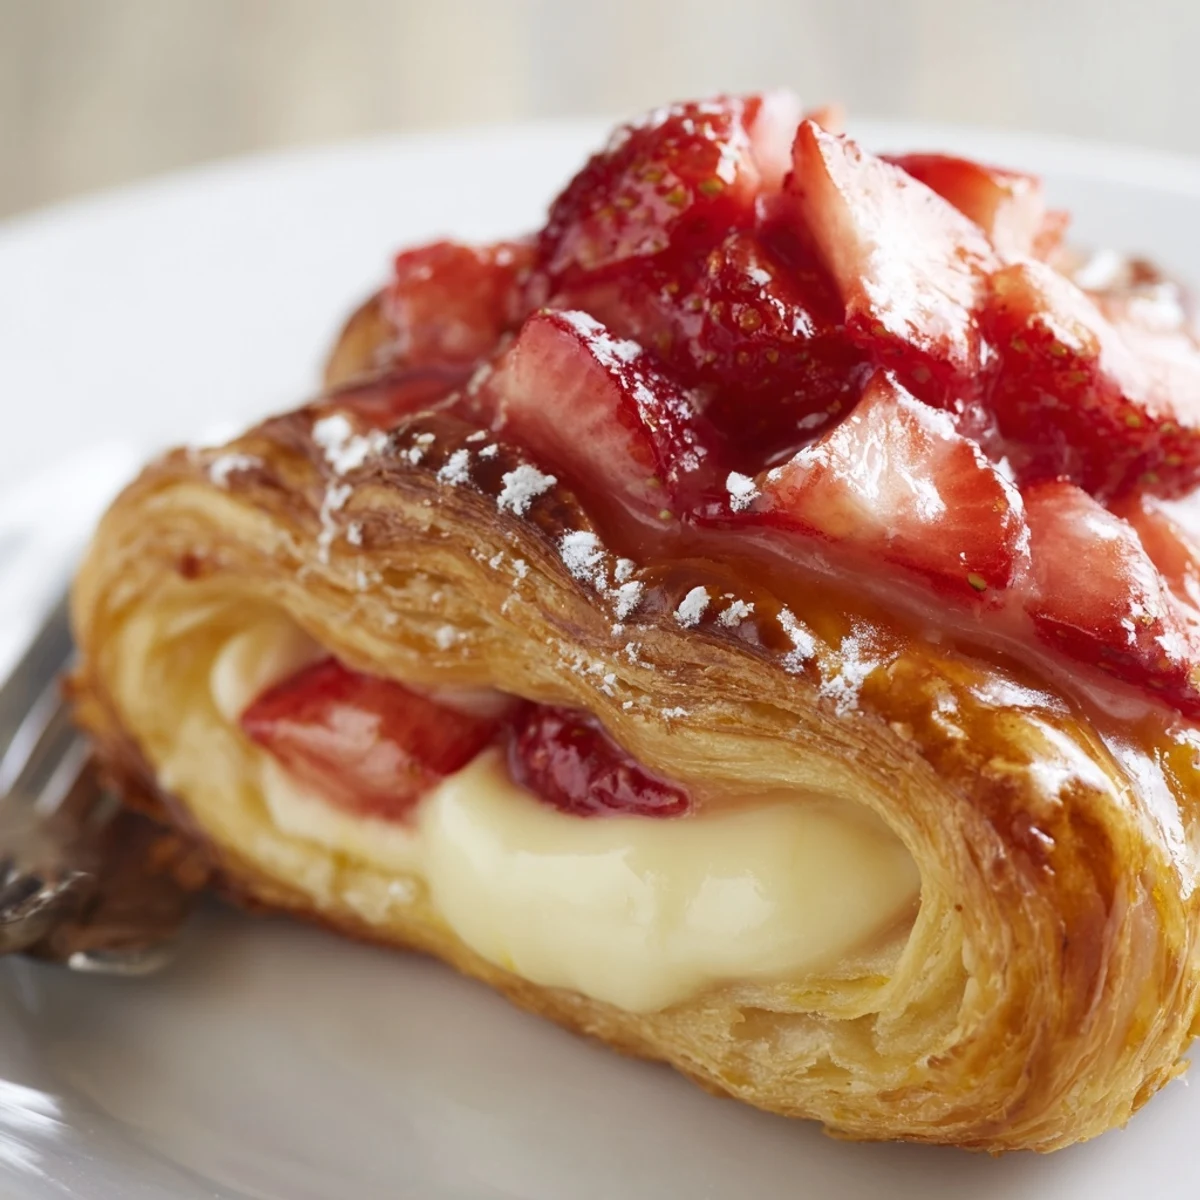
 Make 8 danishes by cutting a thawed puff pastry sheet into 8 squares, scoring a 1 cm border, and layering 1 tbsp sweetened cream cheese and diced strawberries tossed with sugar, lemon and a touch of cornstarch. Brush edges with egg wash and bake at 200°C (400°F) for 18–22 minutes until puffed and golden. Cool slightly and optionally drizzle a vanilla glaze before serving.
The first time I pulled a tray of strawberry Danish pastries from the oven, the kitchen filled with a buttery, fruity haze that made even my impatient neighbor peek in to ask what was baking. It’s funny how the simple act of grating a little lemon zest into cream cheese can send such an unexpectedly bright aroma into the air. My cat perched himself on a stool just to watch the whole production, his nose twitching every time I opened the oven door. These little bundles wound up making the morning feel quietly special, even before that first sticky, sweet bite.
When I hosted brunch for my friends last spring, these Danishes disappeared quicker than the coffee refills. Someone declared them ‘fancier than anything from a cafe’ and insisted on taking the recipe home. It still cracks me up that the look of amazement came just from store-bought puff pastry and a handful of strawberries. Little kitchen victories like these are the ones I savor most.
Ingredients
- Puff pastry sheet: Opt for all-butter if available; thaw it fully so it doesn't crack when rolling out.
- Cream cheese: Softened cream cheese spreads easily and bakes into a luscious layer—bring it to room temperature for the best texture.
- Granulated sugar: A touch goes into both fillings to balance tang and add shine when the strawberries bake.
- Vanilla extract: Real vanilla lifts the cheese filling and glaze—don’t skip it, even a scant teaspoon makes a difference.
- Lemon zest: Just a bit wakes up the filling and perfumes the whole kitchen as these bake.
- Fresh strawberries: The star here; diced small so they soften quickly and don’t make the pastry soggy.
- Lemon juice: Brightens up the strawberry mixture; squeeze it fresh if you can.
- Cornstarch: Thickens the strawberry juices so they set, not seep out.
- Egg: Mixed with milk for the golden, glossy finish that makes these look bakery-ready.
- Milk: Used for the egg wash and to thin the glaze if you’re making it.
- Powdered sugar: Whisked with milk and vanilla for a drizzle that melts into every bite.
Instructions
- Heat up the kitchen:
- Fire up your oven to 200°C (400°F) and line a baking tray with parchment—crisp bottoms depend on it.
- Mix the creamy filling:
- In a small bowl, blend cream cheese, sugar, vanilla, and lemon zest using a spoon or whisk until completely smooth and flecked with yellow zest.
- Prep the strawberries:
- Toss the diced berries with sugar, lemon juice, and cornstarch—stir gently so you don’t crush them, then set aside to macerate.
- Shape your pastry:
- Unfold the puff pastry and, with a sharp knife, cut it into eight squares; don’t fuss over perfect geometry, but do gently score a border to help the edges rise.
- Layer and assemble:
- Spread a heaping spoonful of the cream cheese filling in the center of each square, keeping inside the border, and top with a mound of strawberries.
- Brush and bake:
- Paint the exposed pastry edges with your egg wash, then slide the tray into the oven—bake for 18–22 minutes until golden and gloriously puffed.
- Cooldown time:
- Let pastries cool slightly on a wire rack; the filling will set up as they rest and won’t burn your mouth on first bite.
- Drizzle glaze (optional):
- Stir powdered sugar, milk, and vanilla into a pourable glaze and flick it over the cooled Danishes—don’t worry about perfection, swirls and drips add charm.
 Pin It
 Sometime last summer, I left the pastries on the counter to cool just as the windows caught the late afternoon light. One of my friends snapped a photo of the whole tray glowing on the table, and we all hovered, forks in hand, until the last of the glaze had set. That photo pops up in my memories now and then—a little reminder that something so simple can bring everyone together. Those are the kinds of snacks I keep coming back to.
How to Switch Up the Fillings
I’ve swapped in raspberries, blueberries, and once, even chopped peaches, all with excellent results. When using softer fruit, I skip the cornstarch or use it very sparingly so the filling doesn’t get too thick. Frozen berries work in a pinch—thaw and drain first so the pastries stay crisp enough. Sometimes, a dash of cinnamon in the fruit mix makes it feel extra cozy.
Making Ahead and Storing
If you want to get ahead, pre-cut your pastry and store it in the fridge wrapped in parchment. You can assemble the fillings a few hours before baking—just keep the strawberries separate until ready to build so they don’t turn watery. Leftover Danishes can be revived for a few minutes in a hot oven, which crisps the bottoms and brings back that just-baked warmth.
Quick Fixes for Common Problems
I’ve lost count of how many pastries looked wonky but tasted perfect. Uneven rising happens when borders aren’t scored deeply enough, and a sticky filling usually means the fruit needed more draining. If in doubt, give the tray a gentle quarter-turn during baking for even browning.
- If your filling leaks, try chilling assembled pastries 10 minutes before baking.
- No piping bag needed—spoons do the job just fine.
- Let pastries cool before glazing, otherwise it melts right off.
 Pin It
 Whether you serve these for breakfast, dessert, or a kitchen-table snack with friends, Strawberry Danish brings a bit of bakery magic home. Hope they become a happy staple in your rotation too.
Recipe FAQ
- → How do I prevent soggy pastry bottoms?
-
Drain diced fruit well and toss with a little cornstarch to absorb excess juices. Score a border on the pastry so filling stays centered, bake on a preheated sheet to promote even browning, and avoid overfilling each square.
- → Can I use frozen strawberries instead of fresh?
-
Yes. Thaw fully and drain off excess liquid, then gently toss with sugar and a pinch more cornstarch to compensate for the extra moisture before filling the pastry.
- → What keeps the pastry flaky?
-
Keep the puff pastry cold until baking, handle it minimally, and bake in a very hot oven so the layers steam and separate quickly. Using a cold tray or preheating the oven fully helps ensure a strong oven spring.
- → What can I substitute for cream cheese?
-
Mascarpone, thick ricotta (drained), or a strained Greek yogurt sweetened slightly will work. Adjust sweetness and lemon zest to taste so the filling remains creamy and balanced.
- → Can these be prepared ahead or frozen?
-
Assemble danishes on a tray, freeze until firm, then transfer to a bag for longer storage. Bake from frozen, adding a few extra minutes. Baked danishes keep refrigerated for 2–3 days and reheat briefly to restore crispness.
- → How do I adapt the filling for dietary needs?
-
Use gluten-free puff pastry and dairy-free cream cheese alternatives for intolerances. Substitute plant-based milk in the egg wash or brush with a little melted butter alternative for color if avoiding eggs.