 Pin It
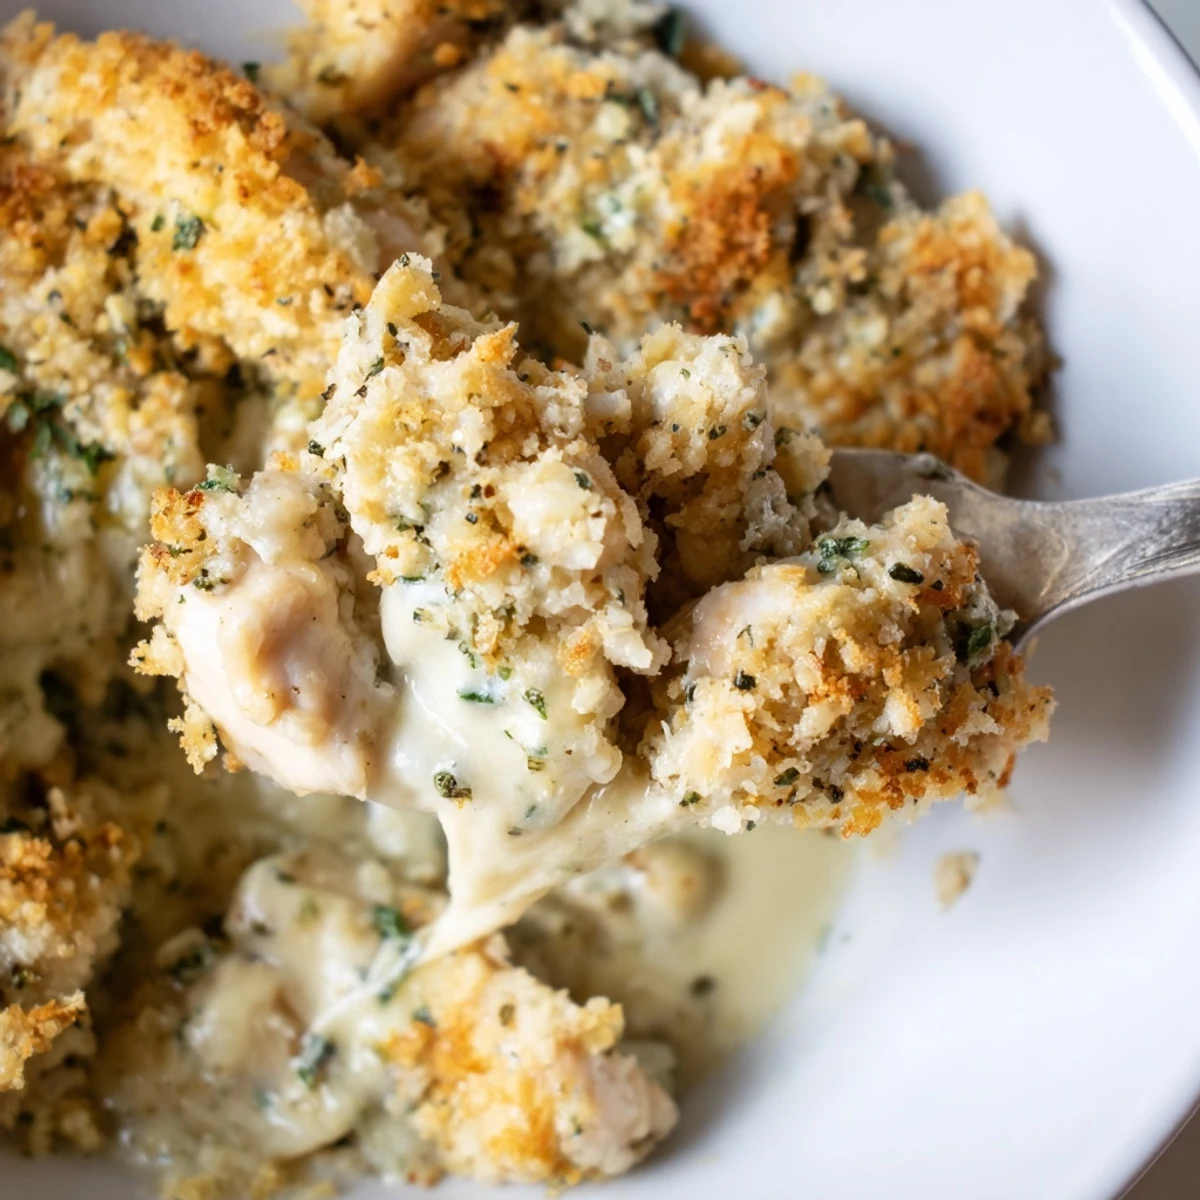
 This Chicken Kiev Casserole transforms the beloved Eastern European classic into a hearty, family-friendly baked dish. Tender pieces of boneless chicken are nestled in a 9x13 baking dish, topped with generous spoonfuls of homemade garlic-herb butter made with fresh parsley, dill, and a splash of lemon juice.
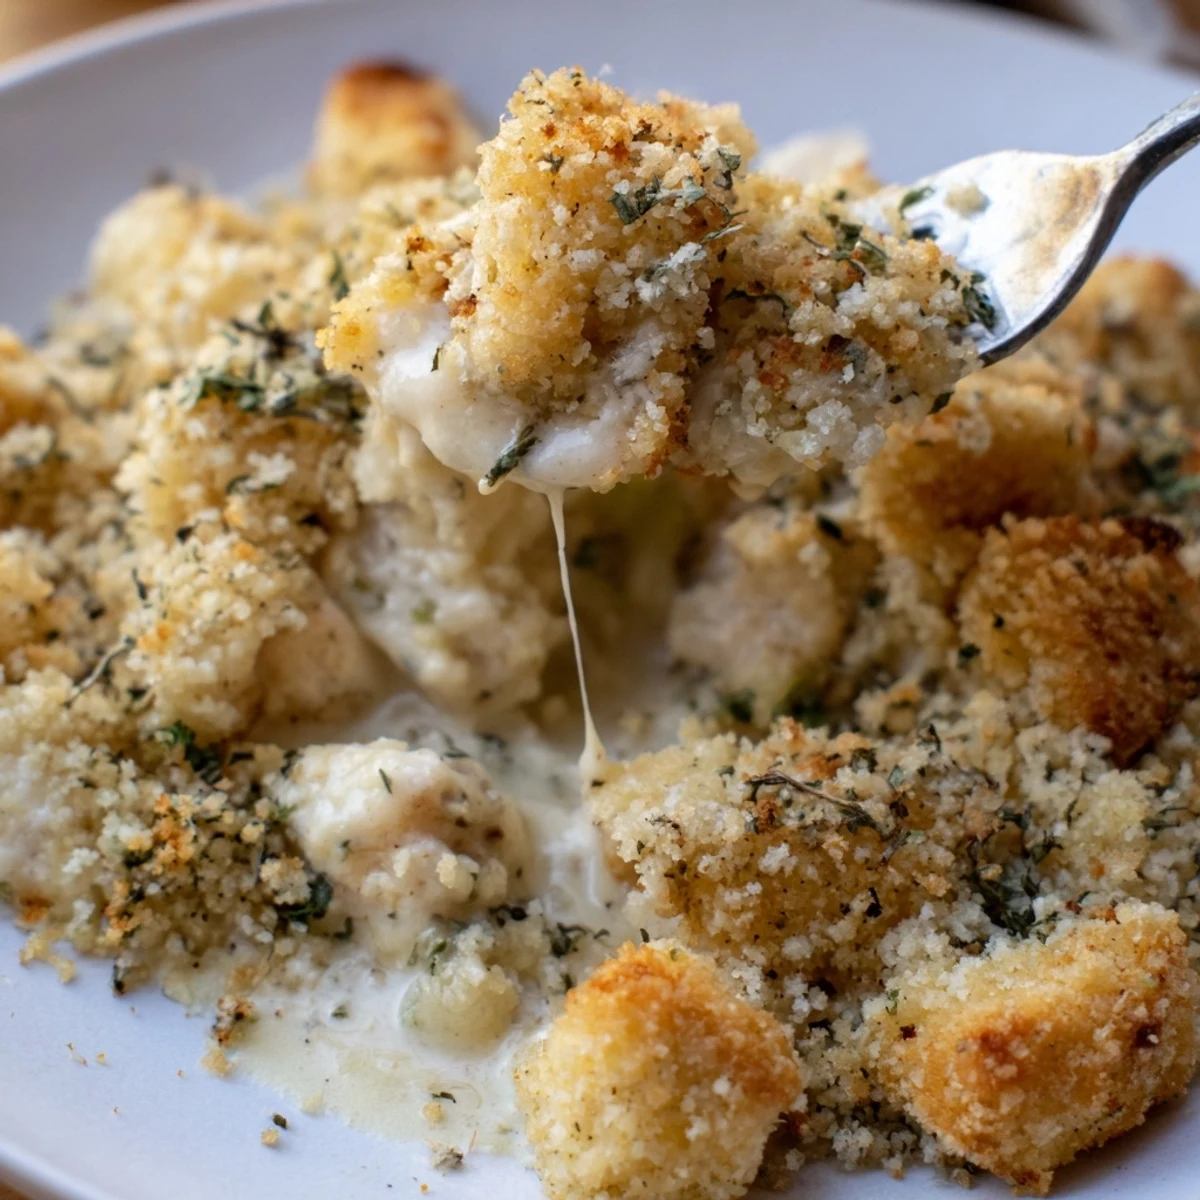
The dish is bathed in a rich combination of heavy cream and chicken broth, then finished with a generous layer of Parmesan cheese and crispy panko breadcrumbs tossed in melted butter and dried thyme. After just 30 to 35 minutes in the oven, you'll have a golden, bubbling casserole with a satisfying crunch that gives way to creamy, garlicky chicken underneath.
The smell of garlic butter hitting a hot oven dish is enough to make anyone wander into the kitchen asking when dinner will be ready. My neighbor actually knocked on my door one Tuesday evening because the aroma had drifted through our shared hallway. Chicken Kiev was always something I considered restaurant territory until I realized a casserole version could capture all that herby buttery magic with half the effort. This dish has since become my unreliable weeknight secret weapon.
I made this for a potluck once and watched three people go back for seconds before anyone even touched the other dishes. There is something about the combination of dill and garlic butter that makes people close their eyes after the first bite.
Ingredients
- 1.5 lbs boneless skinless chicken breasts cut into bite sized pieces: Cutting them small ensures every piece gets coated in that garlic herb butter and cooks evenly without drying out.
- 6 tbsp unsalted butter softened: Room temperature butter blends smoothly with the herbs and creates those rich pockets of flavor throughout the casserole.
- 3 cloves garlic minced: Fresh garlic is nonnegotiable here because the pre minced jar version lacks the sharpness that balances the cream.
- 2 tbsp fresh parsley finely chopped: Flat leaf parsley adds a bright grassy note that cuts through the richness of the dairy.
- 1 tbsp fresh dill finely chopped (optional): Dill is what makes this taste like true Chicken Kiev and I strongly recommend not skipping it.
- 1 tsp lemon juice: Just a squeeze wakes up all the flavors and prevents the butter from tasting flat.
- 1/2 tsp salt and 1/4 tsp ground black pepper: These season the butter mixture so every dollop carries balanced seasoning.
- 1 cup heavy cream or half and half: This creates the luscious sauce that forms around the chicken as it bakes.
- 1/2 cup low sodium chicken broth: Thins the cream slightly and adds savory depth without making the dish overly salty.
- 1/4 cup grated Parmesan cheese: Parmesan melts into the sauce and gives it a subtle nutty finish.
- 1 cup panko breadcrumbs: Panko stays light and crispy even after sitting in the fridge as leftovers the next day.
- 2 tbsp butter melted: This coats the panko so it toasts instead of drying out in the oven.
- 1/2 tsp dried thyme or parsley: A final herbal note in the topping that ties everything together.
- 1/2 cup shredded mozzarella (optional): Adds a stretchy melted layer that kids especially love.
- Nonstick cooking spray or oil for greasing: Prevents the chicken from sticking and makes cleanup painless.
Instructions
- Warm up the oven:
- Preheat to 375 degrees F and lightly grease a 9 by 13 inch baking dish so nothing sticks later.
- Build the compound butter:
- Mash the softened butter with garlic, parsley, dill, lemon juice, salt, and pepper until it looks like a fragrant green flecked paste and you want to eat it with a spoon.
- Lay down the chicken:
- Spread the chicken pieces in an even layer across the bottom of the dish so every piece has room to cook through properly.
- Dot with herb butter:
- Drop small spoonfuls of the garlic herb butter all over the chicken and trust that it will melt into something wonderful.
- Pour the liquids:
- Slowly pour the cream and broth over everything then scatter the Parmesan across the top so it melts into the sauce.
- Add the mozzarella if using:
- Sprinkle it on now for a bubbling golden layer that pulls apart beautifully when served.
- Make the crispy topping:
- Toss panko with melted butter and dried herbs in a small bowl then scatter it evenly across the entire surface.
- Bake until golden:
- Slide it into the oven for 30 to 35 minutes until the top is deeply golden and the chicken is cooked through and tender.
- Let it rest:
- Give it five minutes before serving so the sauce thickens slightly and stops bubbling enough to plate neatly.
 Pin It
 One rainy Sunday I brought this to a friend who had just come home from the hospital. She called me the next morning to say it was the first real meal she had enjoyed in weeks and asked for the recipe immediately.
Serving Suggestions
A simple green salad with a vinaigrette cuts through the richness perfectly. I also love serving this over steamed rice or alongside roasted asparagus when asparagus is in season.
Storage and Leftovers
This reheats surprisingly well covered in foil at 350 degrees F for about fifteen minutes. The topping loses some crunch but the flavors actually deepen overnight which makes the leftovers arguably better than the first night.
Variations to Try
Once you master the base recipe there are dozens of ways to change it up depending on what you have on hand.
- Tuck a layer of sauteed spinach between the chicken and the butter for extra color and nutrients.
- Swap gluten free panko to make this safe for anyone with wheat sensitivities.
- Try adding a half cup of thawed frozen peas for little bursts of sweetness throughout.
 Pin It
 This is the kind of recipe that turns an ordinary weeknight into something people remember. Keep it in your back pocket and watch it become the dish everyone requests.
Recipe FAQ
- → Can I use chicken thighs instead of chicken breasts?
-
Yes, boneless, skinless chicken thighs work wonderfully in this casserole. They tend to stay juicier and more flavorful during baking. Just make sure to cut them into similar bite-sized pieces so they cook evenly throughout the dish.
- → How do I store and reheat leftovers?
-
Store leftovers in an airtight container in the refrigerator for up to 3 days. To reheat, cover the casserole with foil and warm in a 350°F oven for about 15 to 20 minutes, or microwave individual portions until heated through. The topping may soften but will still taste delicious.
- → Can I prepare this casserole ahead of time?
-
Absolutely. You can assemble the entire casserole up to 24 hours in advance, cover it tightly with plastic wrap, and keep it refrigerated. When ready to bake, remove the wrap, add the panko topping, and bake as directed. You may need to add 5 to 10 extra minutes to the baking time if going straight from the refrigerator.
- → What can I substitute for heavy cream?
-
Half-and-half is the easiest swap and is already suggested in the ingredient list. For a lighter version, you can use whole milk mixed with a tablespoon of flour to help thicken the sauce. Keep in mind that using lower-fat dairy will result in a less rich and creamy sauce.
- → What side dishes pair well with this casserole?
-
This rich and creamy casserole pairs beautifully with simple sides that balance its indulgence. Consider serving it alongside steamed green beans, a fresh garden salad, roasted asparagus, buttered egg noodles, or garlic mashed potatoes. A crusty bread roll is also great for soaking up the flavorful sauce.
- → Can I freeze this casserole?
-
Yes, you can freeze it either before or after baking. For best results, assemble without the breadcrumb topping, wrap tightly in foil, and freeze for up to 2 months. Thaw overnight in the refrigerator, add the topping, and bake as directed. If freezing after baking, the topping will lose some of its crunch but the flavors will remain excellent.