 Pin It
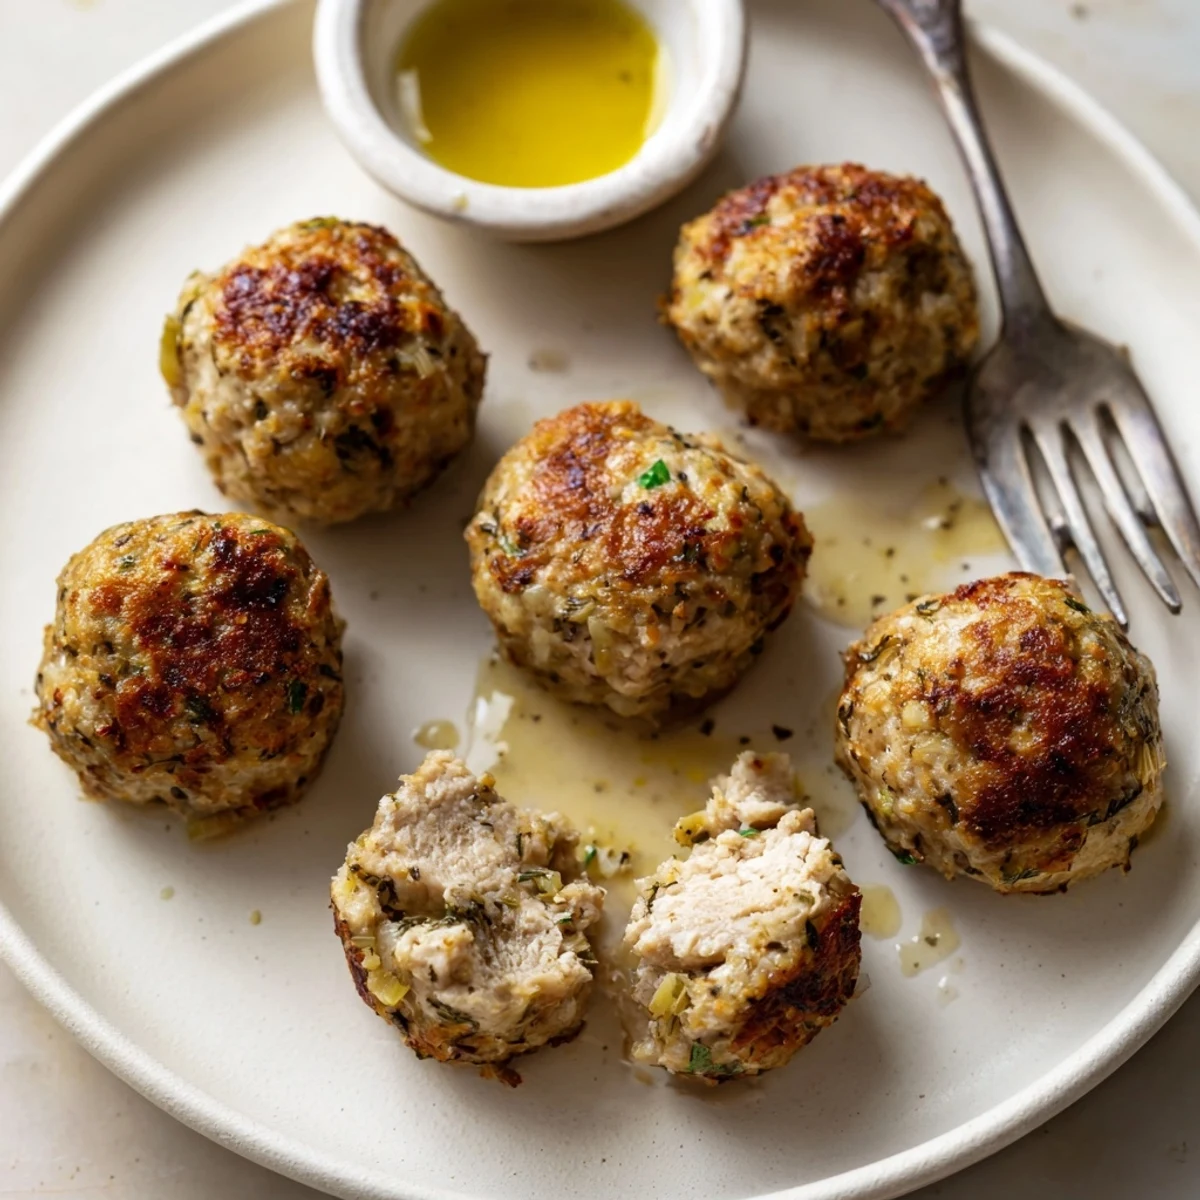
 These sage and onion chicken balls combine ground thigh meat with sauteed onion, garlic, chopped fresh sage and a touch of thyme. Breadcrumbs and a beaten egg bind the mixture; shape into tablespoon-sized balls, brush with olive oil and bake at 200°C (400°F) until golden and cooked through. Serve hot with honey-mustard, cranberry sauce or alongside roasted root vegetables. Use gluten-free crumbs to avoid wheat allergens.
The first time I made these Sage Onion Chicken Balls, I was giddy from the aroma alone—the scent of onion gently sizzling, sage floating in the air, and the slight hush of excitement in my kitchen as things started coming together. I caught myself nibbling a bit of the sautéed onion, grinning at how surprisingly sweet it turned out. What started as a way to use up herbs lingering in the fridge quickly became a small obsession. These are the kind of bites you make for the mood as much as for the meal.
One chilly afternoon, I ended up making these for friends I hadn&apost seen in ages—three adults, one sleepy toddler, and a plate of these chicken balls disappearing faster than I thought possible. My best friend declared it her new favorite, dipping them into tangy honey-mustard while recalling old times in between bites. The kitchen filled with laughter and the warm, herbal scent that made us all linger a little longer, just to steal another one off the tray. That was the moment I realized this recipe was a keeper.
Ingredients
- Ground chicken (preferably thigh meat): This keeps the balls juicy and tender—using thigh instead of breast makes a world of difference.
- Medium onion: Dice it finely so it melds into the mixture for subtle sweetness and moisture; sautéing first is key to avoid raw flavor.
- Garlic cloves: Mince well for a mellow backbone—let them gently toast with the onion rather than burn.
- Fresh sage: Chopped sage sings in this dish; I sometimes scrunch the leaves first to release even more aroma.
- Salt & black pepper: Don't be shy—these basics ensure every bite tastes seasoned through and through.
- Dried thyme: Adds that whisper of earthiness that plays nicely with sage and chicken.
- Pinch of nutmeg (optional): I learned to add just a tiny pinch—enough to warm things up, never to overpower.
- Breadcrumbs: They bind everything; gluten-free works well, but let them soak up a little moisture for best texture.
- Large egg: The ultimate binder—I gently beat it before mixing to keep things consistent.
- Olive oil: For sautéing and brushing; the right amount delivers that perfect golden finish as they bake.
Instructions
- Get the oven ready:
- Preheat to 200°C (400°F) and line your baking tray—this helps you skip scrubbing later.
- Sauté onion & garlic:
- Start onion in olive oil over medium heat; once soft, add garlic for one last minute and let cool so it doesn't scramble the egg later.
- Mix chicken & herbs:
- Combine the chicken, cooled aromatics, sage, thyme, salt, pepper, and a sprinkling of nutmeg if you like—use clean hands or a fork for even mixing.
- Add binders:
- Sprinkle in the breadcrumbs and pour in the egg, mixing just until combined; overmixing makes things dense.
- Shape the balls:
- Damp hands work wonders here—shape about a heaping tablespoon per ball and line them up on your tray.
- Drizzle or brush with oil:
- Give each ball a quick brush or drizzle to encourage browning in the oven.
- Bake until golden:
- Cook for 20–25 minutes, turning halfway so every side is golden and juices run clear—aim for 74°C/165°F inside.
- Serve straight away:
- Hot from the oven, offer with your favorite dip or let them cozy up next to roasted veggies.
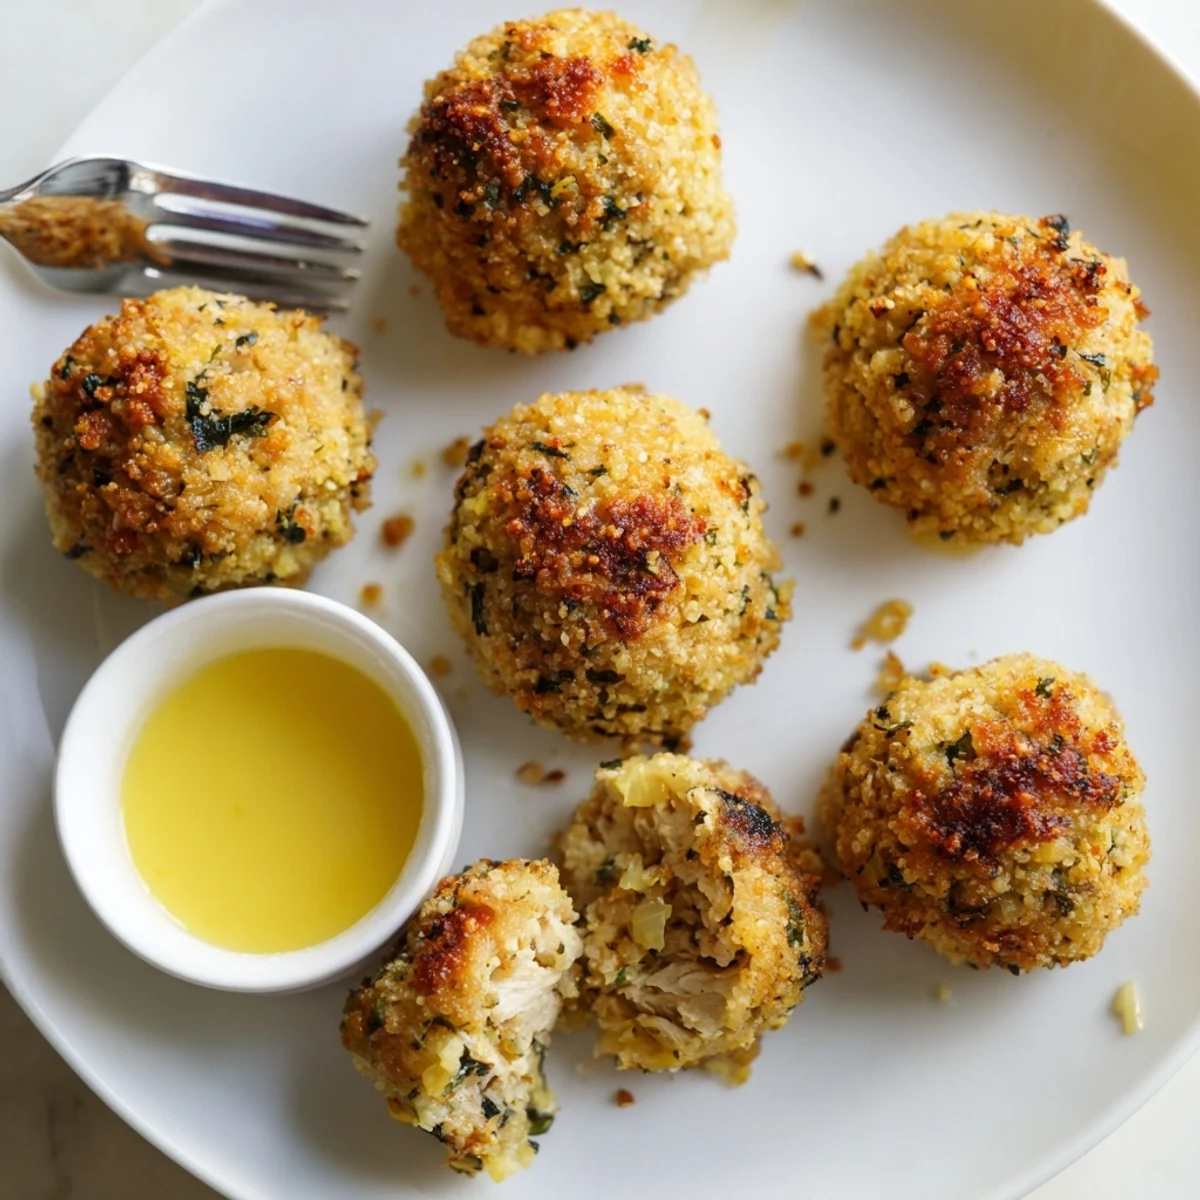 Pin It
 There's a little magic in pulling a tray of these out of the oven for a family movie night—their spicy-herby scent makes my living room feel suddenly festive. I watched my partner swirl the last sage chicken ball in cranberry sauce, make a contented sigh, and declare it "holiday food any day."
Serving Suggestions Straight from My Table
I've tried these chicken balls with everything from a simple yogurt dip to a zesty cranberry sauce. When tucked into soft wraps with fresh greens, they become the star of an easy lunch; paired with roasted root vegetables, they feel robust and comforting. More than once, I found leftovers make the best cold snack straight from the fridge.
How to Make It Work Gluten-Free
The switch to gluten-free breadcrumbs is barely noticeable if you let them hydrate with the onion and egg mixture for a minute before mixing. I always double-check labels—even the sneakiest crumbs can contain traces of wheat. The key is letting the mixture bind naturally, not by force, for the lightest, juiciest results.
Making Ahead & Storage Tips
On busy weeknights, I shape these balls earlier in the day, cover, and keep them in the fridge until dinnertime. They also freeze beautifully once baked—just reheat in a moderate oven, and they'll taste freshly made. If you manage to have leftovers, they blend into grain bowls or salads with little effort.
- Shape and chill up to 24 hours before baking for fresher flavor.
- Cooked chicken balls reheat best in the oven, not the microwave.
- Don't skip the oil brush—crispy outsides make all the difference.
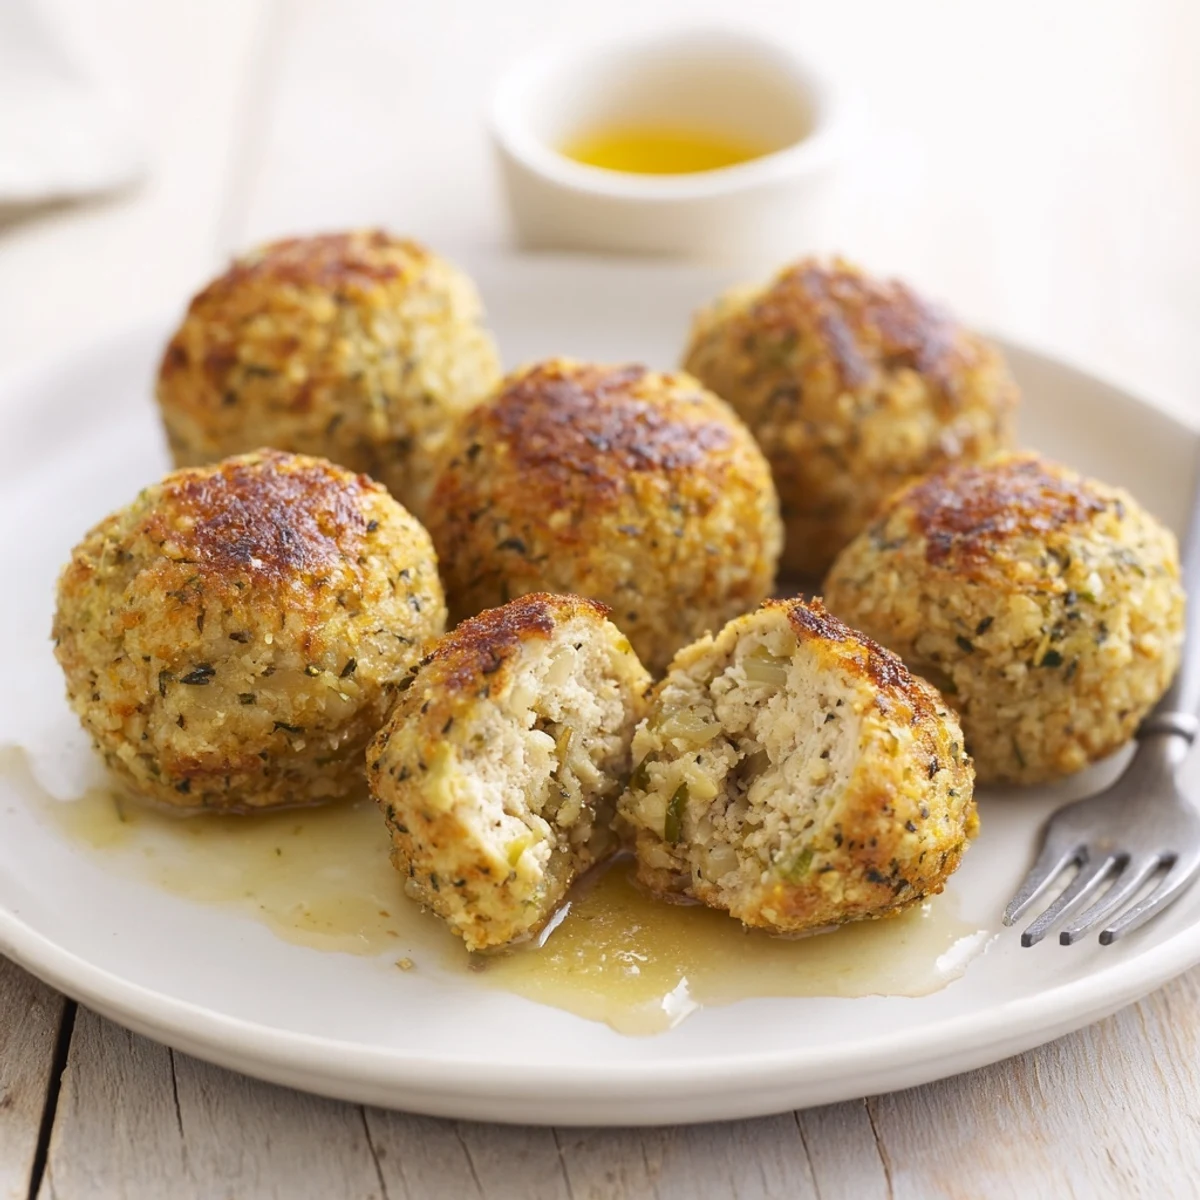 Pin It
 May your kitchen fill with good smells and good company when you bake these. They're as welcoming at a party as they are on a quiet Tuesday night.
Recipe FAQ
- → Can I use chicken breast instead of thigh meat?
-
Yes. Breast will be leaner and can dry out more easily; add a little olive oil or a tablespoon of mayonnaise to maintain juiciness and avoid overmixing.
- → How do I make them gluten-free?
-
Swap regular breadcrumbs for certified gluten-free breadcrumbs or crushed gluten-free crackers. Check labels on all packaged ingredients to ensure no cross-contamination.
- → How can I prevent soggy centers?
-
Use dry breadcrumbs and avoid overpacking the mixture. Chill the formed balls briefly before baking and ensure oven is fully preheated so they set quickly.
- → Can these be pan-fried instead of baked?
-
Yes. Shallow-fry in a skillet with a few tablespoons of oil over medium heat, turning often until golden and cooked through. Finish in the oven if needed to ensure even cooking.
- → What internal temperature indicates doneness?
-
Cook until the center reaches 74°C (165°F). They should be golden on the outside and no longer pink inside when sliced.
- → How should leftovers be stored and reheated?
-
Refrigerate in an airtight container for up to 3 days. Reheat in a 180°C (350°F) oven for 8–10 minutes to restore crispness, or microwave briefly if short on time.